Task任务脚本 
任务处理脚本
Task任务脚本 
对于一些手动操作,进行数据同步的工作,都是task完成,另外, 对于一些耗时比较长的操作,譬如同步数据,不适合即时处理,适合通过任务的方式
管理员在后台操作数据同步,就下了一个任务,然后通过离线脚本来处理任务内容
1.Task任务脚本文件路径:
./addons/fecmall/fecerp/shell/task.sh
2.通过linux CRON定时任务执行Task.sh
执行crontab -e,进入cron编辑部分,进行脚本添加
* * * * * /usr/bin/flock -xn /www/web_logs/task.lock -c '/bin/bash /www/web/demo/fecerp/addons/fecmall/fecerp/shell/task.sh >> /www/web_logs/fecerp/task.log 2>&1'
由于各个task的执行时间有偏差,有时候脚本执行时间比较长,有时间比较短,而我们希望每分钟循环执行一次(增强时效性),因此需要通过锁 机制,当task执行超过一分钟没有完成,那么下一分钟的task执行的时候将会取消,直至当前task执行完成,才会执行下一个task
/usr/bin/flock -xn /www/web_logs/task.lock -c 'xxxxxxxxxx': linux锁机制
/bin/bash /www/web/demo/fecerp/addons/fecmall/fecerp/shell/task.sh >> /www/web_logs/fecerp/task.log 2>&1:执行的task.sh文件
路径,以及将执行结果写入到/www/web_logs/fecerp/task.log
2.1文件创建以及权限设置:(例子)
mkdir /www/web_logs

touch /www/web_logs/task.lock
chmod 777 /www/web_logs/task.lock

touch /www/web_logs/fecerp/task.log
chmod 777 /www/web_logs/fecerp/task.log

chmod 755 /www/web/demo/fecerp/addons/fecmall/fecerp/shell/task.sh
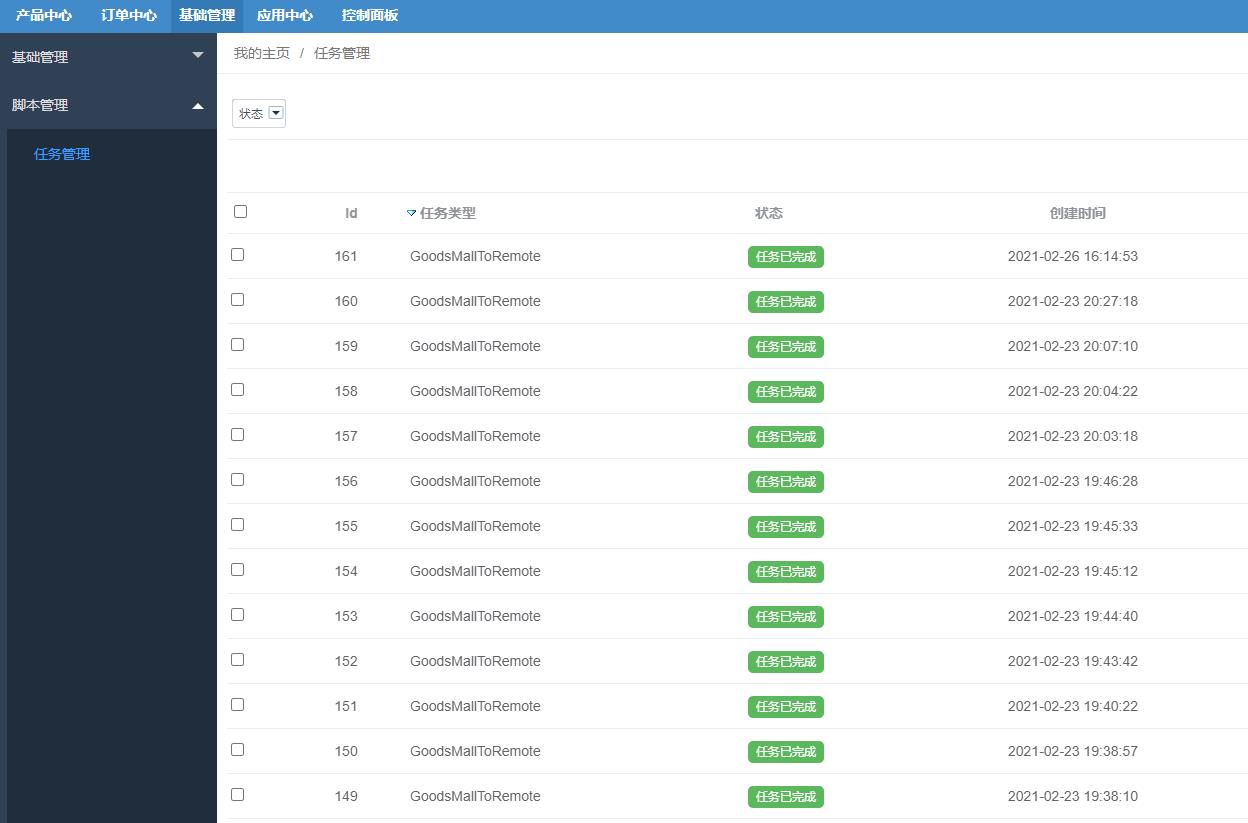
2.2添加cron后,您可以添加一下产品同步,譬如将基础库产品同步到商城产品库,可以在后台查看task列表:
Task任务原理 
讲解task的创建,执行步骤
1.Task的创建
譬如:当您在后台 基础管理 --> 基础管理 --> 网站配置 , 点击同步基础数据,勾选同步项,就会添加一个Task
1.1文件:fecerp\app\appadmin\modules\Baseconfig\block\site,大约66行代码
foreach ($sync_info as $item) {
    if ($item == 'mutil_lang') {
        $type = 'LanguageMallToRemote';
        Yii::$service->task->createTask($type, $taskContent);
    } else if ($item == 'currency') {
        $type = 'CurrencyMallToRemote';
        Yii::$service->task->createTask($type, $taskContent);
    } else if ($item == 'product_attr') {
        $type = 'GoodsAttrMallToRemote';
        Yii::$service->task->createTask($type, $taskContent);
    } else if ($item == 'product_brand') {
        $type = 'GoodsBrandMallToRemote';
        Yii::$service->task->createTask($type, $taskContent);
    } else if ($item == 'category') {
        $type = 'CategoryMallToRemote';
        Yii::$service->task->createTask($type, $taskContent);
    } else if ($item == 'product') {
        $type = 'GoodsMallToRemote';
        Yii::$service->task->createTask($type, $taskContent);
    }
}
然后机会执行函数Yii::$service->task->createTask($type, $taskContent)创建task
1.2打开文件@fecerp/services/Task.php , 查看代码
public function createTask($type, $taskContent)
{
    $siteId = $taskContent['condition']['site_id'];
    $this->initTaskServiceByType($type, $siteId);
    $model = new $this->_modelName;
    $model->type = $type;
    $model->task_content = $this->_taskTypeService->getTypeTaskContent($taskContent);
    $model->created_at = time();
    $model->plan_at = $this->_taskTypeService->getPlanAt();    // $planAt;
    $model->status = $this->getInitStatus();

    return $model->save();
}

public function initTaskServiceByType($type, $siteId)
{
    $this->_taskTypeService = $this->_getTaskServiceByType($type, $siteId);

    return;
}
protected function _getTaskServiceByType($type, $siteId)
{
    $obName = $type;
    $siteM = Yii::$service->mallsite->getByTaskSiteId($siteId);
    $siteType = isset($siteM['type']) ? $siteM['type'] : '';
    if (!$siteType) {
        throw new InvalidValueException('site type can not empty');
    }
    if (isset($this->taskTypeServices[$siteType]) && $this->taskTypeServices[$siteType]) {
        $storagePath = $this->taskTypeServices[$siteType];
        if (substr($storagePath,0,1) == '@') {
            $currentService = Yii::getAlias($storagePath).'\\'.ucfirst($obName);

            return new $currentService();
        }
    }
    $className = get_class($this);
    $storagePath = '\\'.strtolower($className).'\\'.strtolower($siteType).'\\';
    $currentService =  $storagePath.ucfirst($obName);

    return new $currentService();
}
通过传递的$type,找到对应的实例task文件,实例化并赋值给$this->_taskTypeService,
譬如:当$type = 'GoodsMallToRemote' && 网站类型为fecmall,将会将@fecerp\services\task\fecmall\GoodsMallToRemote.php 实例化并赋值于 $this->_taskTypeService
然后通过实例task, 处理数据,创建Task。
$model->task_content = $this->_taskTypeService->getTypeTaskContent($taskContent);
$model->plan_at = $this->_taskTypeService->getPlanAt();    // $planAt;
erp后台的同步操作,基本都是通过该方式创建Task,创建task的本质,就是往task数据表里面插入一条数据。
2.执行task
Task的执行,是console执行的,因此您需要配置cron,通过计划任务来执行脚本,具体参看顶部Task任务脚本
2.1打开文件 @fecerp/shell/task.sh, 可以看到,最终的执行是 yii base/task/processtask
,这个console controller对应的文件是@fecerp\app\console\modules\Base\controllers\TaskController.php,
找到函数
public function actionProcesstask($taskPageNum, $taskContentPageNum)
{
    Yii::$service->task->processTask($taskPageNum, $taskContentPageNum);
}
2.2打开文件@fecerp/services/Task.php , 查看代码
public function processTask($taskPageNum, $taskContentPageNum)
{
    $taskM = $this->getTaskMByPageNum($taskPageNum);
     if (!$taskM || !$taskM['type']) {

        return;
    }
    $type = $taskM['type'];
    $task_content = $taskM['task_content'];
    $taskContent = unserialize($task_content);
    $siteId = isset($taskContent['condition']['site_id']) ? $taskContent['condition']['site_id'] : '';
    $this->initTaskServiceByType($type, $siteId);

    return $this->_taskTypeService->processTask($taskM, $taskContentPageNum);
}
在第1部分,我们创建了$type = 'GoodsMallToRemote'的task,那么通过函数$this->initTaskServiceByType($type, $siteId);,
$this->_taskTypeService对应的是@fecerp\services\task\fecmall\GoodsMallToRemote.php
,打开这个文件,找到函数processTask($taskM, $taskContentPageNum)
public function processTask($taskM, $taskContentPageNum)
{
    $task_content = $taskM['task_content'];
    $task_content = unserialize($task_content);
    $siteId = $task_content['condition']['site_id'];
    // withImg or withNoImg
    $taskType = $task_content['type'];
    $whereArr = isset($task_content['condition']['where']) ? $task_content['condition']['where'] : [];
    if (!$siteId) {

        return false;
    }
    Yii::$service->mallsite->initCurrentSiteId($siteId);
    $filter = [
        'numPerPage' 	=> $this->numPerPage,
        'pageNum'		=> $taskContentPageNum,
        'asArray'  => true,
    ];
    if (is_array($whereArr) && !empty($whereArr)) {
        $filter['where'] = $whereArr;
    }
    $collData = Yii::$service->goods->mallgoods->coll($filter);
    Yii::$service->logs->info("processTask############");

    $apiUrlKey = '/v1/product/upsertone2';
    $apiDatas = $this->getApiData($collData['coll']);
    foreach ($apiDatas as $apiData) {
        // 如果是同步产品图片的task,则进行产品图片更新
        if ($taskType == 'withImg') {
            // 同步产品图
            $image = $apiData['image'];
            Yii::$service->logs->info($apiData['id']);
            //Yii::$service->logs->info($image);
            // 同步细节图
            if (isset($image['gallery']) && is_array($image['gallery'])) {
                foreach ($image['gallery'] as $imgOne) {
                    if (isset($imgOne['image']) && $imgOne['image']) {
                        $this->syncProductImg($siteId, $imgOne['image']);
                    }
                }
            }
            // 同步主图
            if (isset($image['main']['image']) && $image['main']['image']) {
                $this->syncProductImg($siteId, $image['main']['image']);
            }
        }
        //Yii::$service->logs->info('apiData####: ');
        Yii::$service->logs->info($apiData);
        Yii::$service->task->taskApi($siteId, $apiUrlKey, 'post', ['product' => $apiData]);
    }

    return true;
}
通过这个函数进行数据同步。
到这里,task的执行逻辑讲解就完成了
二开扩展,创建新的task或者重写已有的Task 
1.在fecmall的基础上创建新的task,或者重写已有的fecmall的task。您可以通过配置
'services' => [
    'task' => [
        // 'class' => 'fecerp\services\Task',
        'taskTypeServices' => [
            'magento' => [
                'GoodsBaseToMall' => '@myerp/services/task/magento/GoodsBaseToMall'
            ],
        ],
    ],
],
新建@myerp/services/task/magento/GoodsBaseToMall.php即可,在里面实现逻辑
2.添加新的类型站点
譬如添加magento类型的站点(如果已经添加,则忽略即可)
详细参看ERP站点配置管理
然后添加配置(设置文件夹路径)
'services' => [
    'task' => [
        // 'class' => 'fecerp\services\Task',
        'taskTypeServicesStoragePath' => [
            'magento' => '@myerp/services/task/magento',
        ],
    ],
],
然后,新建:@myerp/services/task/magento/GoodsBaseToMall.php即可
您可以在@myerp/services/task/magento/文件夹下面添加其他的task文件,
3.创建Task实例
完成第1和第2步骤的配置,我们就需要创建Task实例,新创建的Task必须实现接口 fecerp\services\task\TaskInterface
譬如:
<?php
namespace myerp\services\task\magento;

use Yii;
use yii\base\InvalidValueException;
use fecshop\services\Service;
use fecerp\services\task\TaskInterface

/**
 * @author Terry Zhao <2358269014@qq.com>
 * @since 1.0
 */
class GoodsBaseToMall extends Service implements TaskInterface
{
    ...
}
您可以打开fecerp\services\task\TaskInterface,查看需要实现的方法
<?php
namespace fecerp\services\task;
interface TaskInterface
{
    /**
     * @param $taskContent
     * task service 创建task函数createTask需要调用该函数,将传递过来的$taskContent,再处理一下返回。
     * 一般是 serialize 函数处理一下返回。
     */
    public function getTypeTaskContent($taskContent);
    /**
     * task执行的时间戳,一般直接返回time()即可
     */
    public function getPlanAt();
    /**
     * @param $taskM | task model
     * 对于同步数据或者其他一些数据量比较大的task,需要多页同步,因此通过该函数返回task内容的总页数
     * 如果数据量小,这里直接返回1即可。
     */
    public function getTaskContentPageCount($taskM);
    /**
     * @param $taskM | task model
     * @param $taskContentPageNum | int,task处理内容的当前页数
     * 处理当前页的具体task内容
     */
    public function processTask($taskM, $taskContentPageNum);
}
3.创建任务
您可以在后台,创建任务,可以参看上面的Task任务原理部分,创建task任务
,将会往task任务数据表中插入任务数据
譬如:

执行批量推送已勾选,默认对应的taskType是GoodsMallToRemote, 在fecmall类型站点,对应的是
@fecerp\services\task\fecmall\GoodsMallToRemote.php,您可以参考这个实现,来写一个magento类型
站点的推送商品的实现
打开@fecerp/services/task/fecmall您会发现有很多的具体的taskType services,
如果您添加新类型站点,您可以根据需要进行实现这些task。
4.执行任务
当console执行task.sh脚本的时候,就会执行该task类函数processTask,因此您在该函数实现您执行的代码即可。
到这里任务的介绍就完成了,您可以参看上面的文档了解大致流程,然后阅读fecerp的代码,然后开发您自己的同步task。
譬如:对接新的数据,或者新的平台,都可以用fecerp的task机制完成,非常容易扩展